Thanks be to God for His Indescribable Gift!

(If you are opening this in your email, please click on the BLUE TITLE, “Thanks be to God for His Indescribable Gift!”,
in order to open this in a much larger and better window.)
~~*~~
Indescribable!!
It’s a powerful word…very effectively expressing the magnitude of something that is so beyond words that it cannot be easily described.
And that word: indescribable, beautifully defines the gift God has given…to us….through His love……
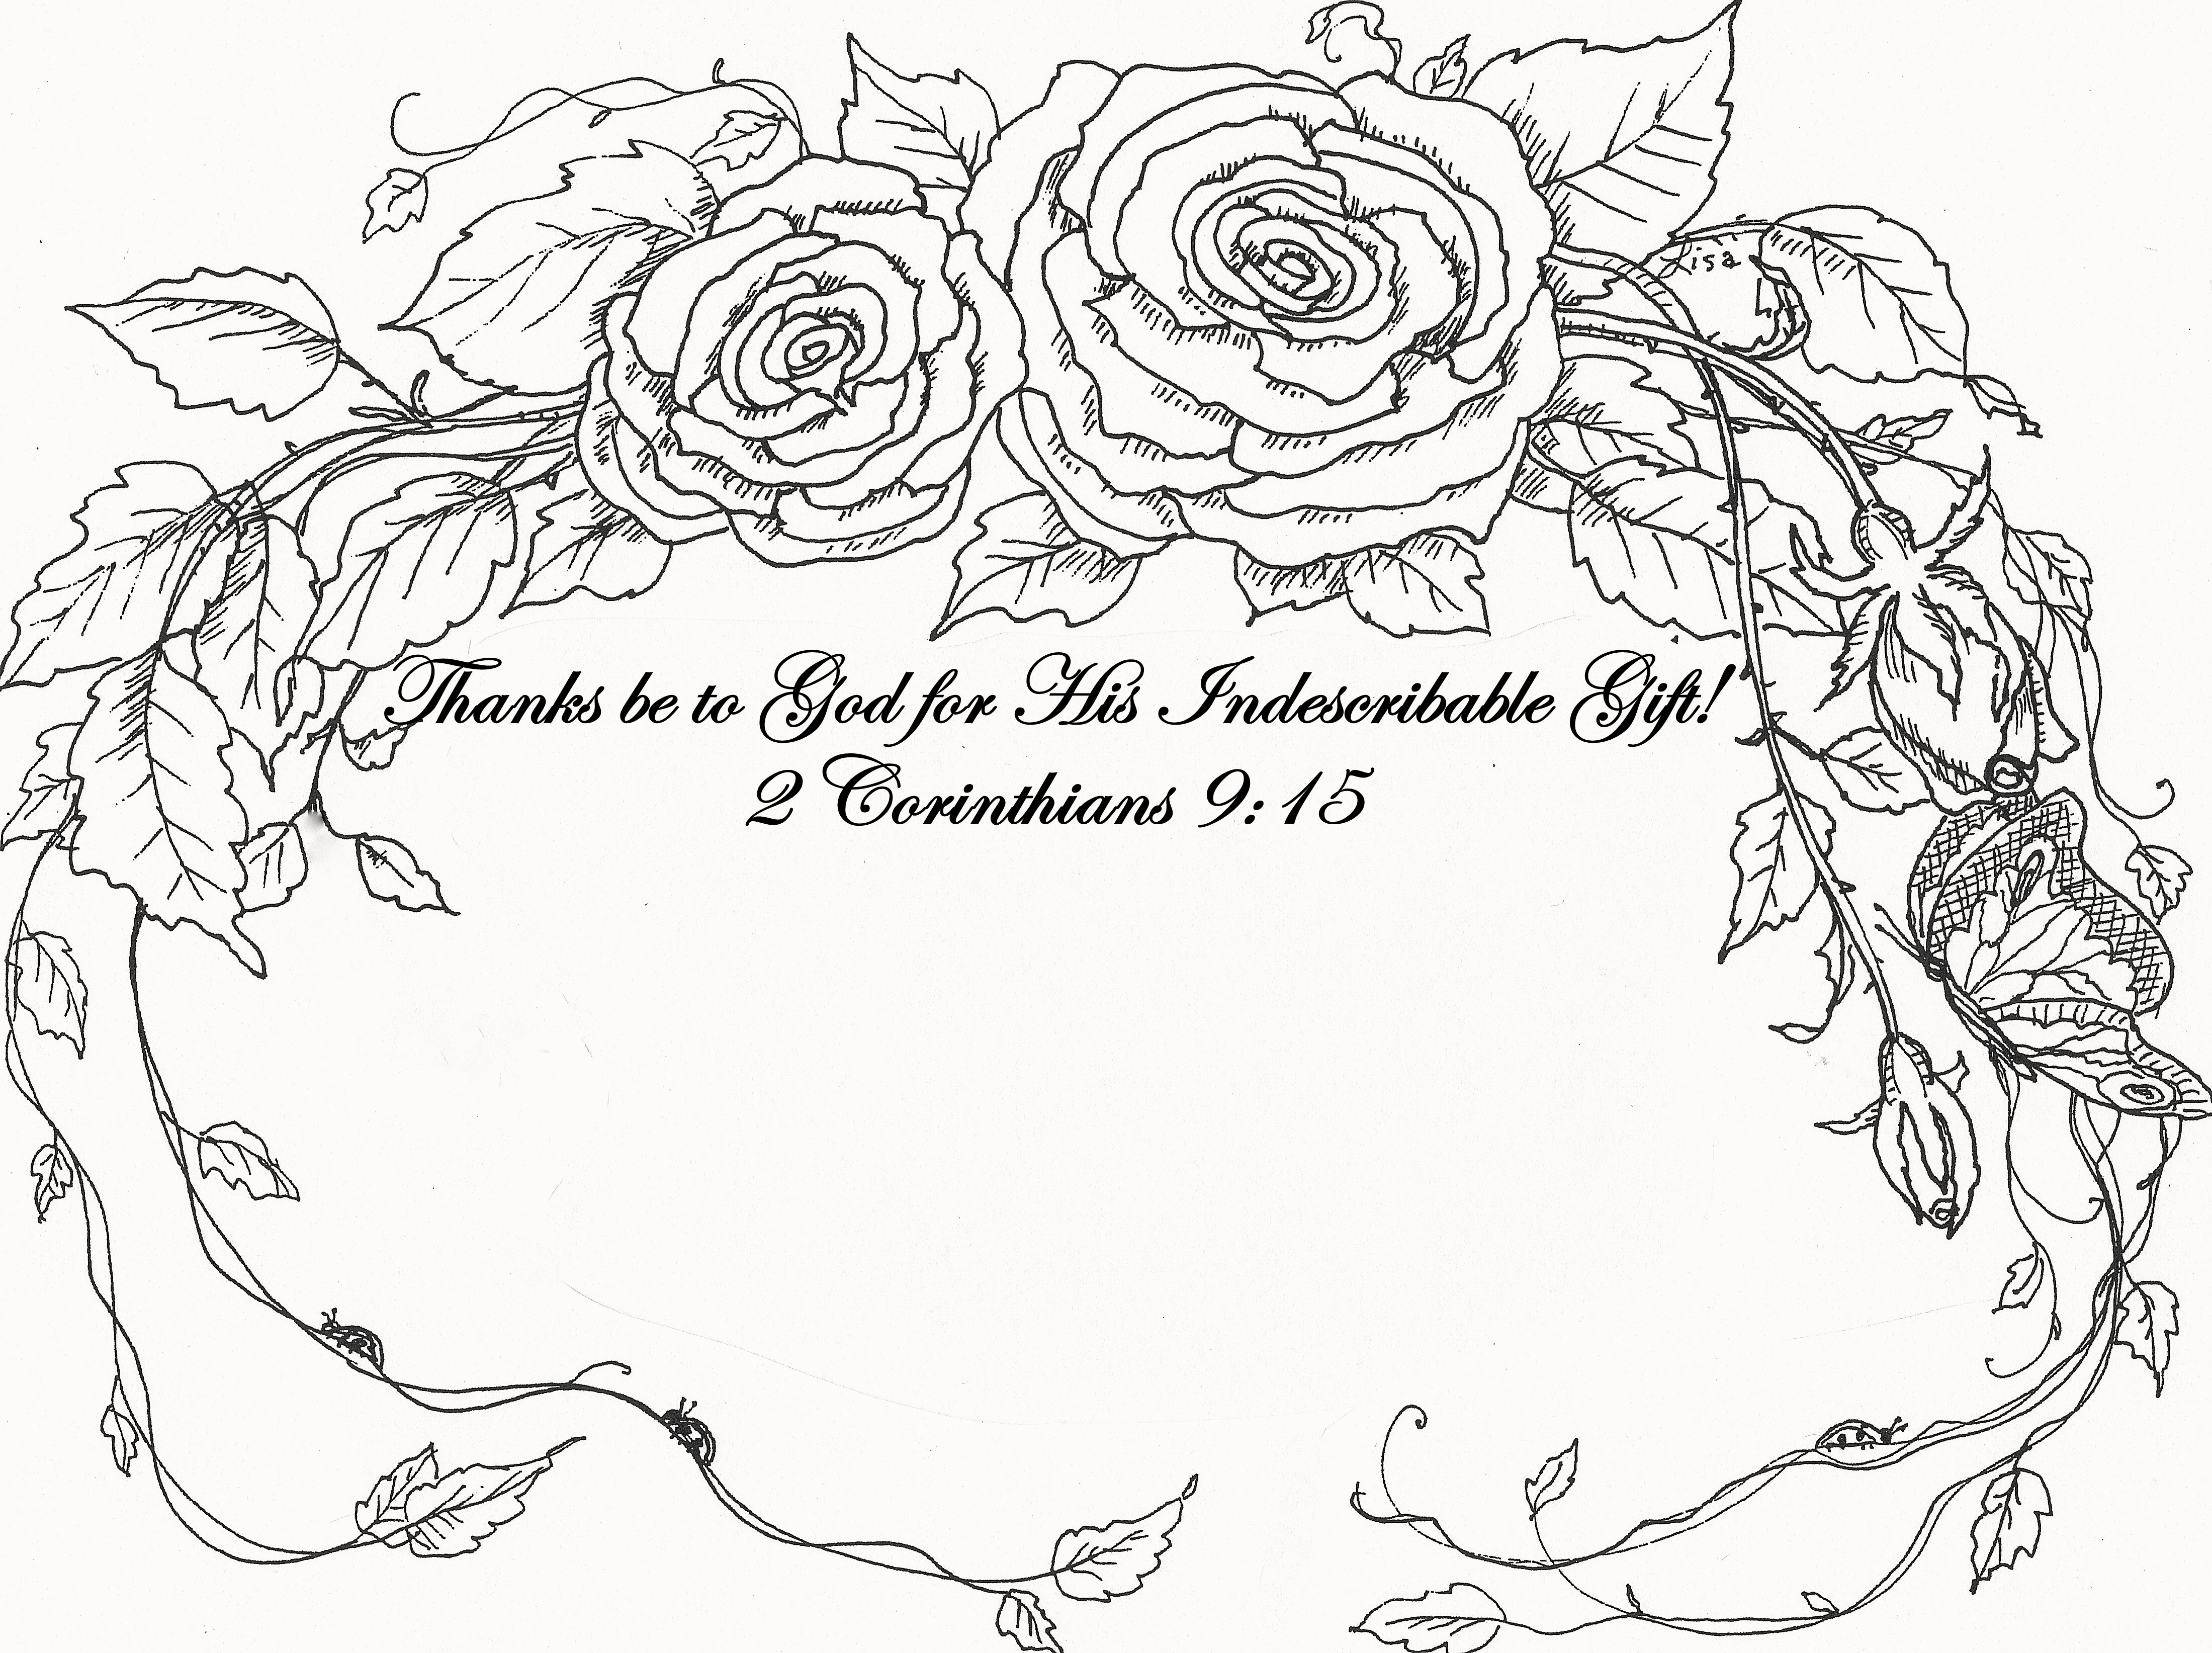
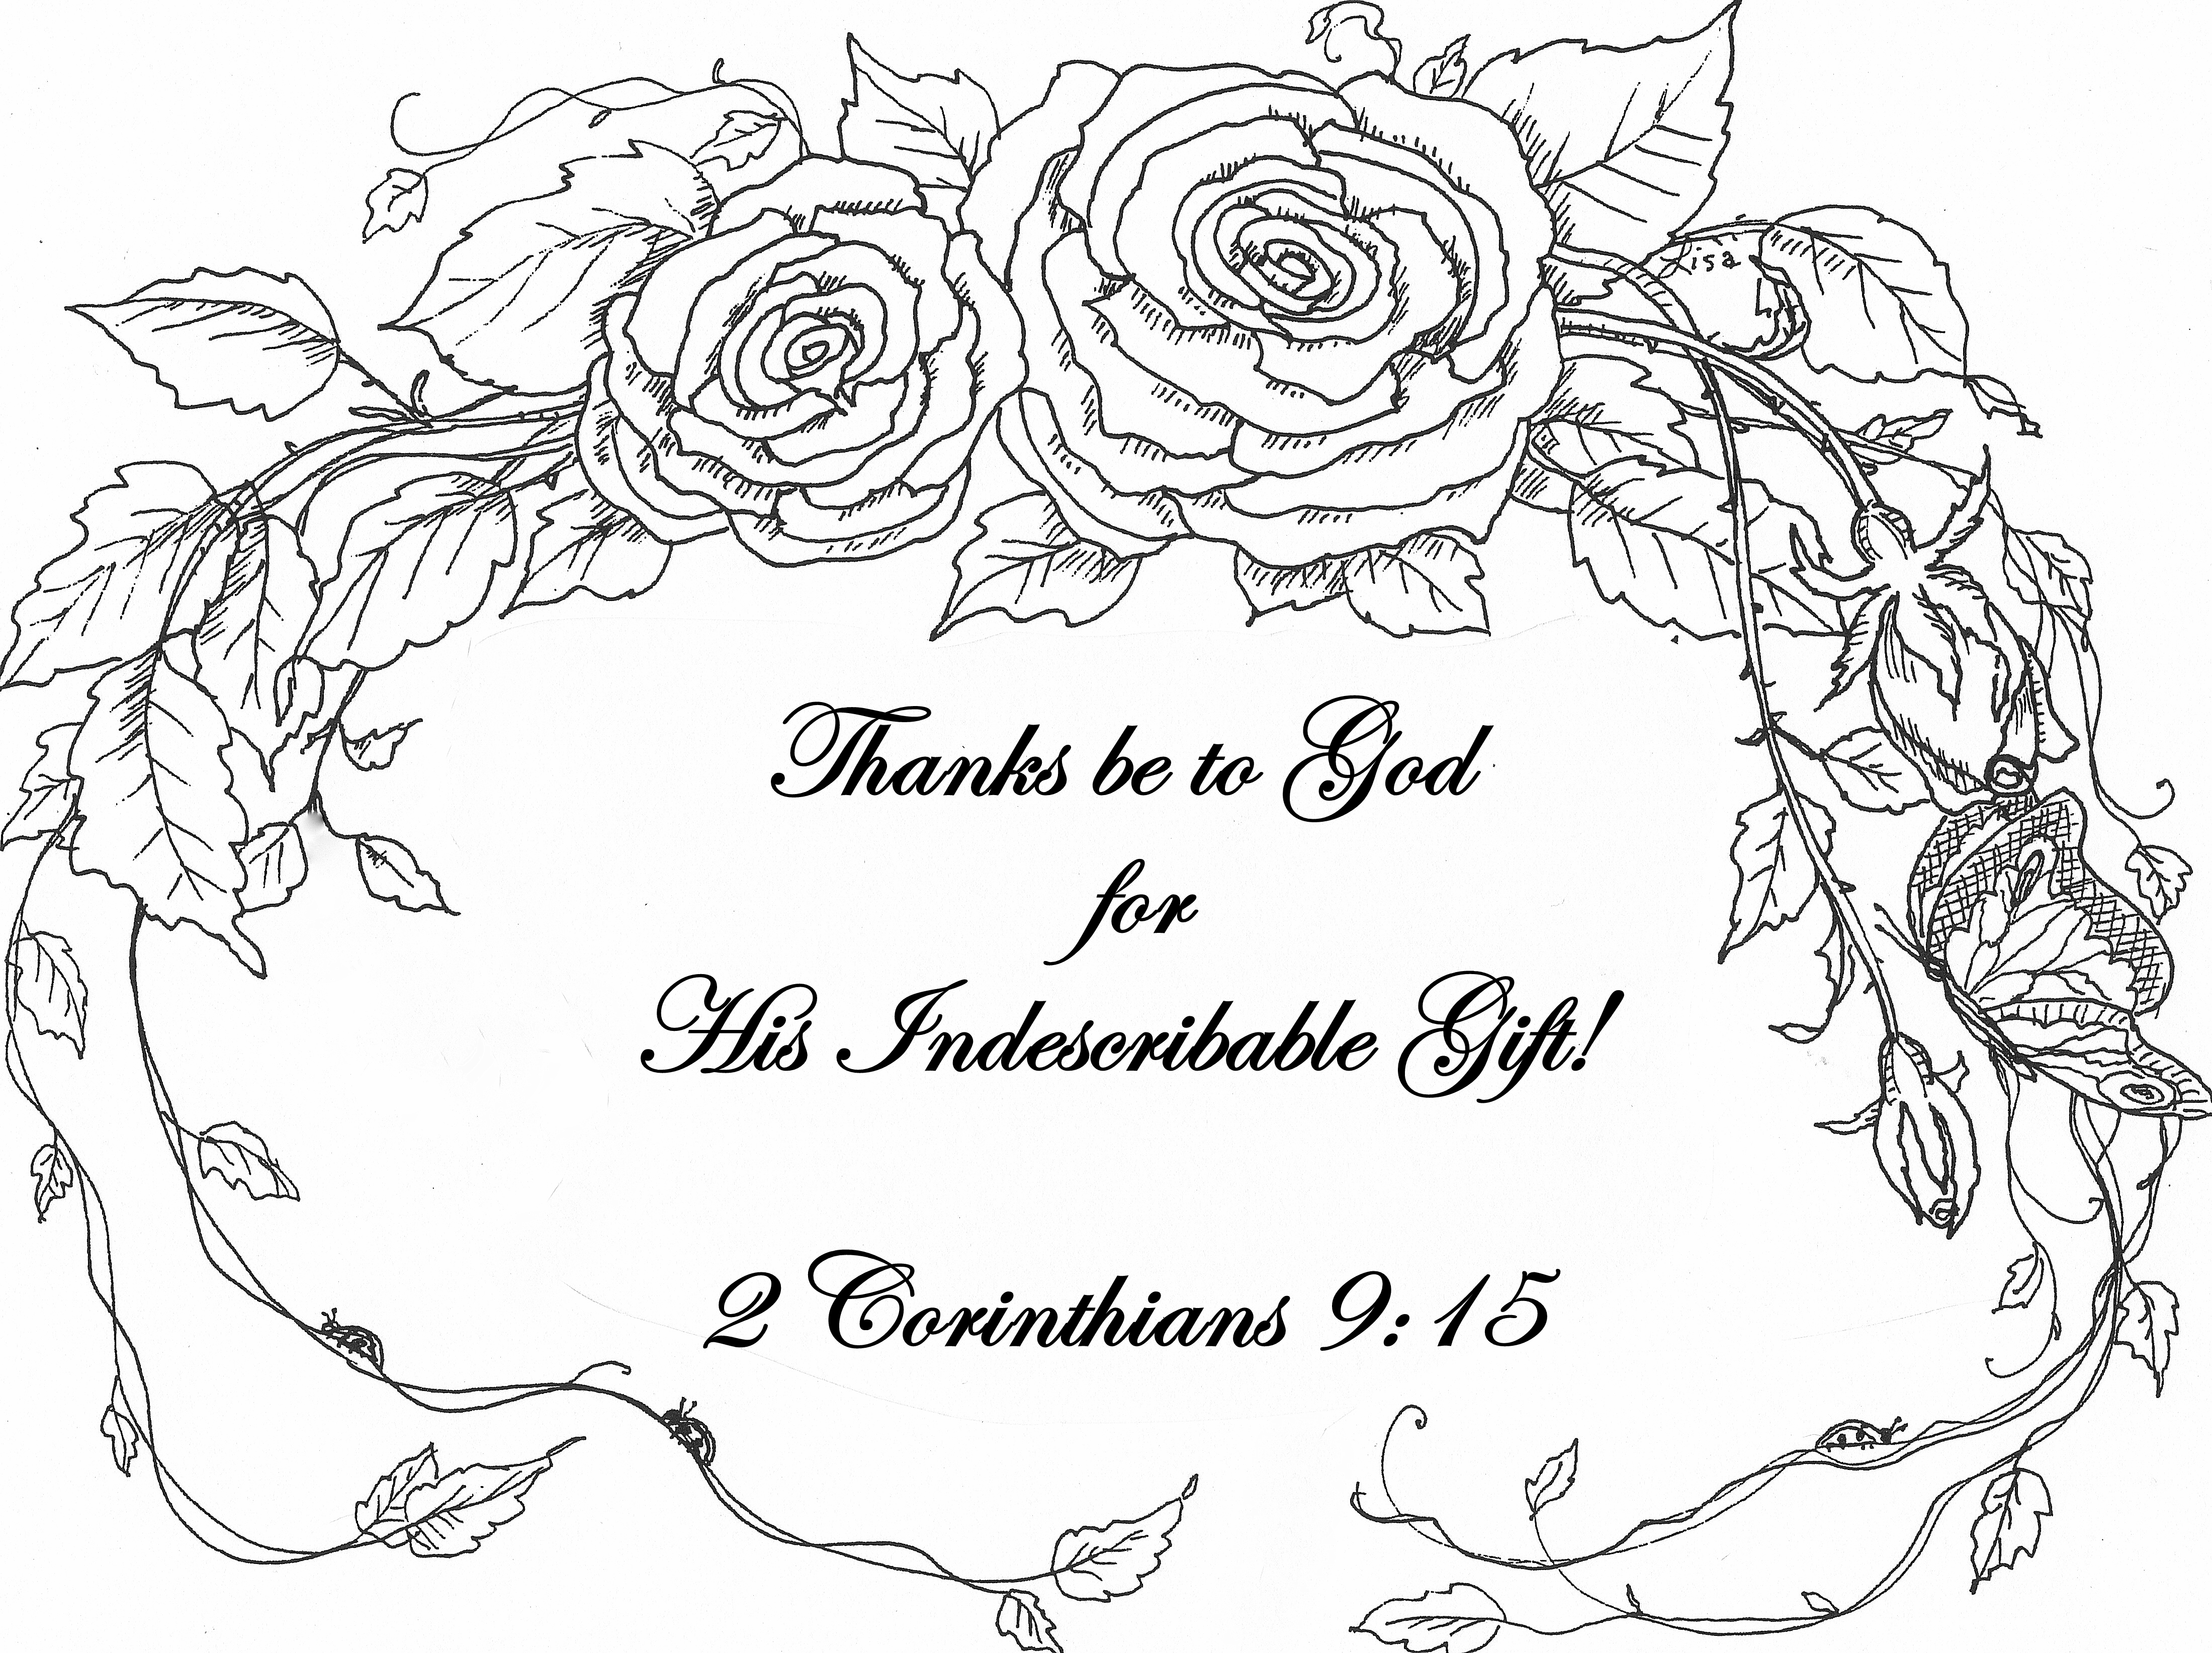
The above sketch is the final one in our Thankfulness Journal Series!
And it’s scripture, from 2 Corinthians 9:15,
reminds us of the amazing gift of God!….and of His love!…of His plan to buy us back from our own sinful choices!…..through His beautiful gift of grace and mercy!…through His plan to give His own beloved Son Jesus–for us!!…to pay for our sins!…at the moment we are buried with Him, baptized into Christ…making us new!…and putting us into His family at that time!…as we submit to, and obey God, following closely to Him…in thanksgiving for His indescribable gift!!!!
Such an indescribable gift!!!!
Thank You–thank You–thank You Lord.!!!!
“Thanks be to God for His indescribable gift!”
I hope that you will enjoy using the above graphic for writing down your thanksgivings to God–Who is so worthy of our thanks and praise!!!
(As a note, if you choose to copy and paste this graphic, in order to print it–I’d suggest that you situate the graphic at the top of the page, which will leave plenty of writing space below it for your thanksfulness journaling…)
~~*~~
And speaking of journaling…
….I’ll show you just how to make a journal…though, if you are short on time…you can always print the graphics from today and the last 3 posts, and gather them all together in a binder or folder, just as well.
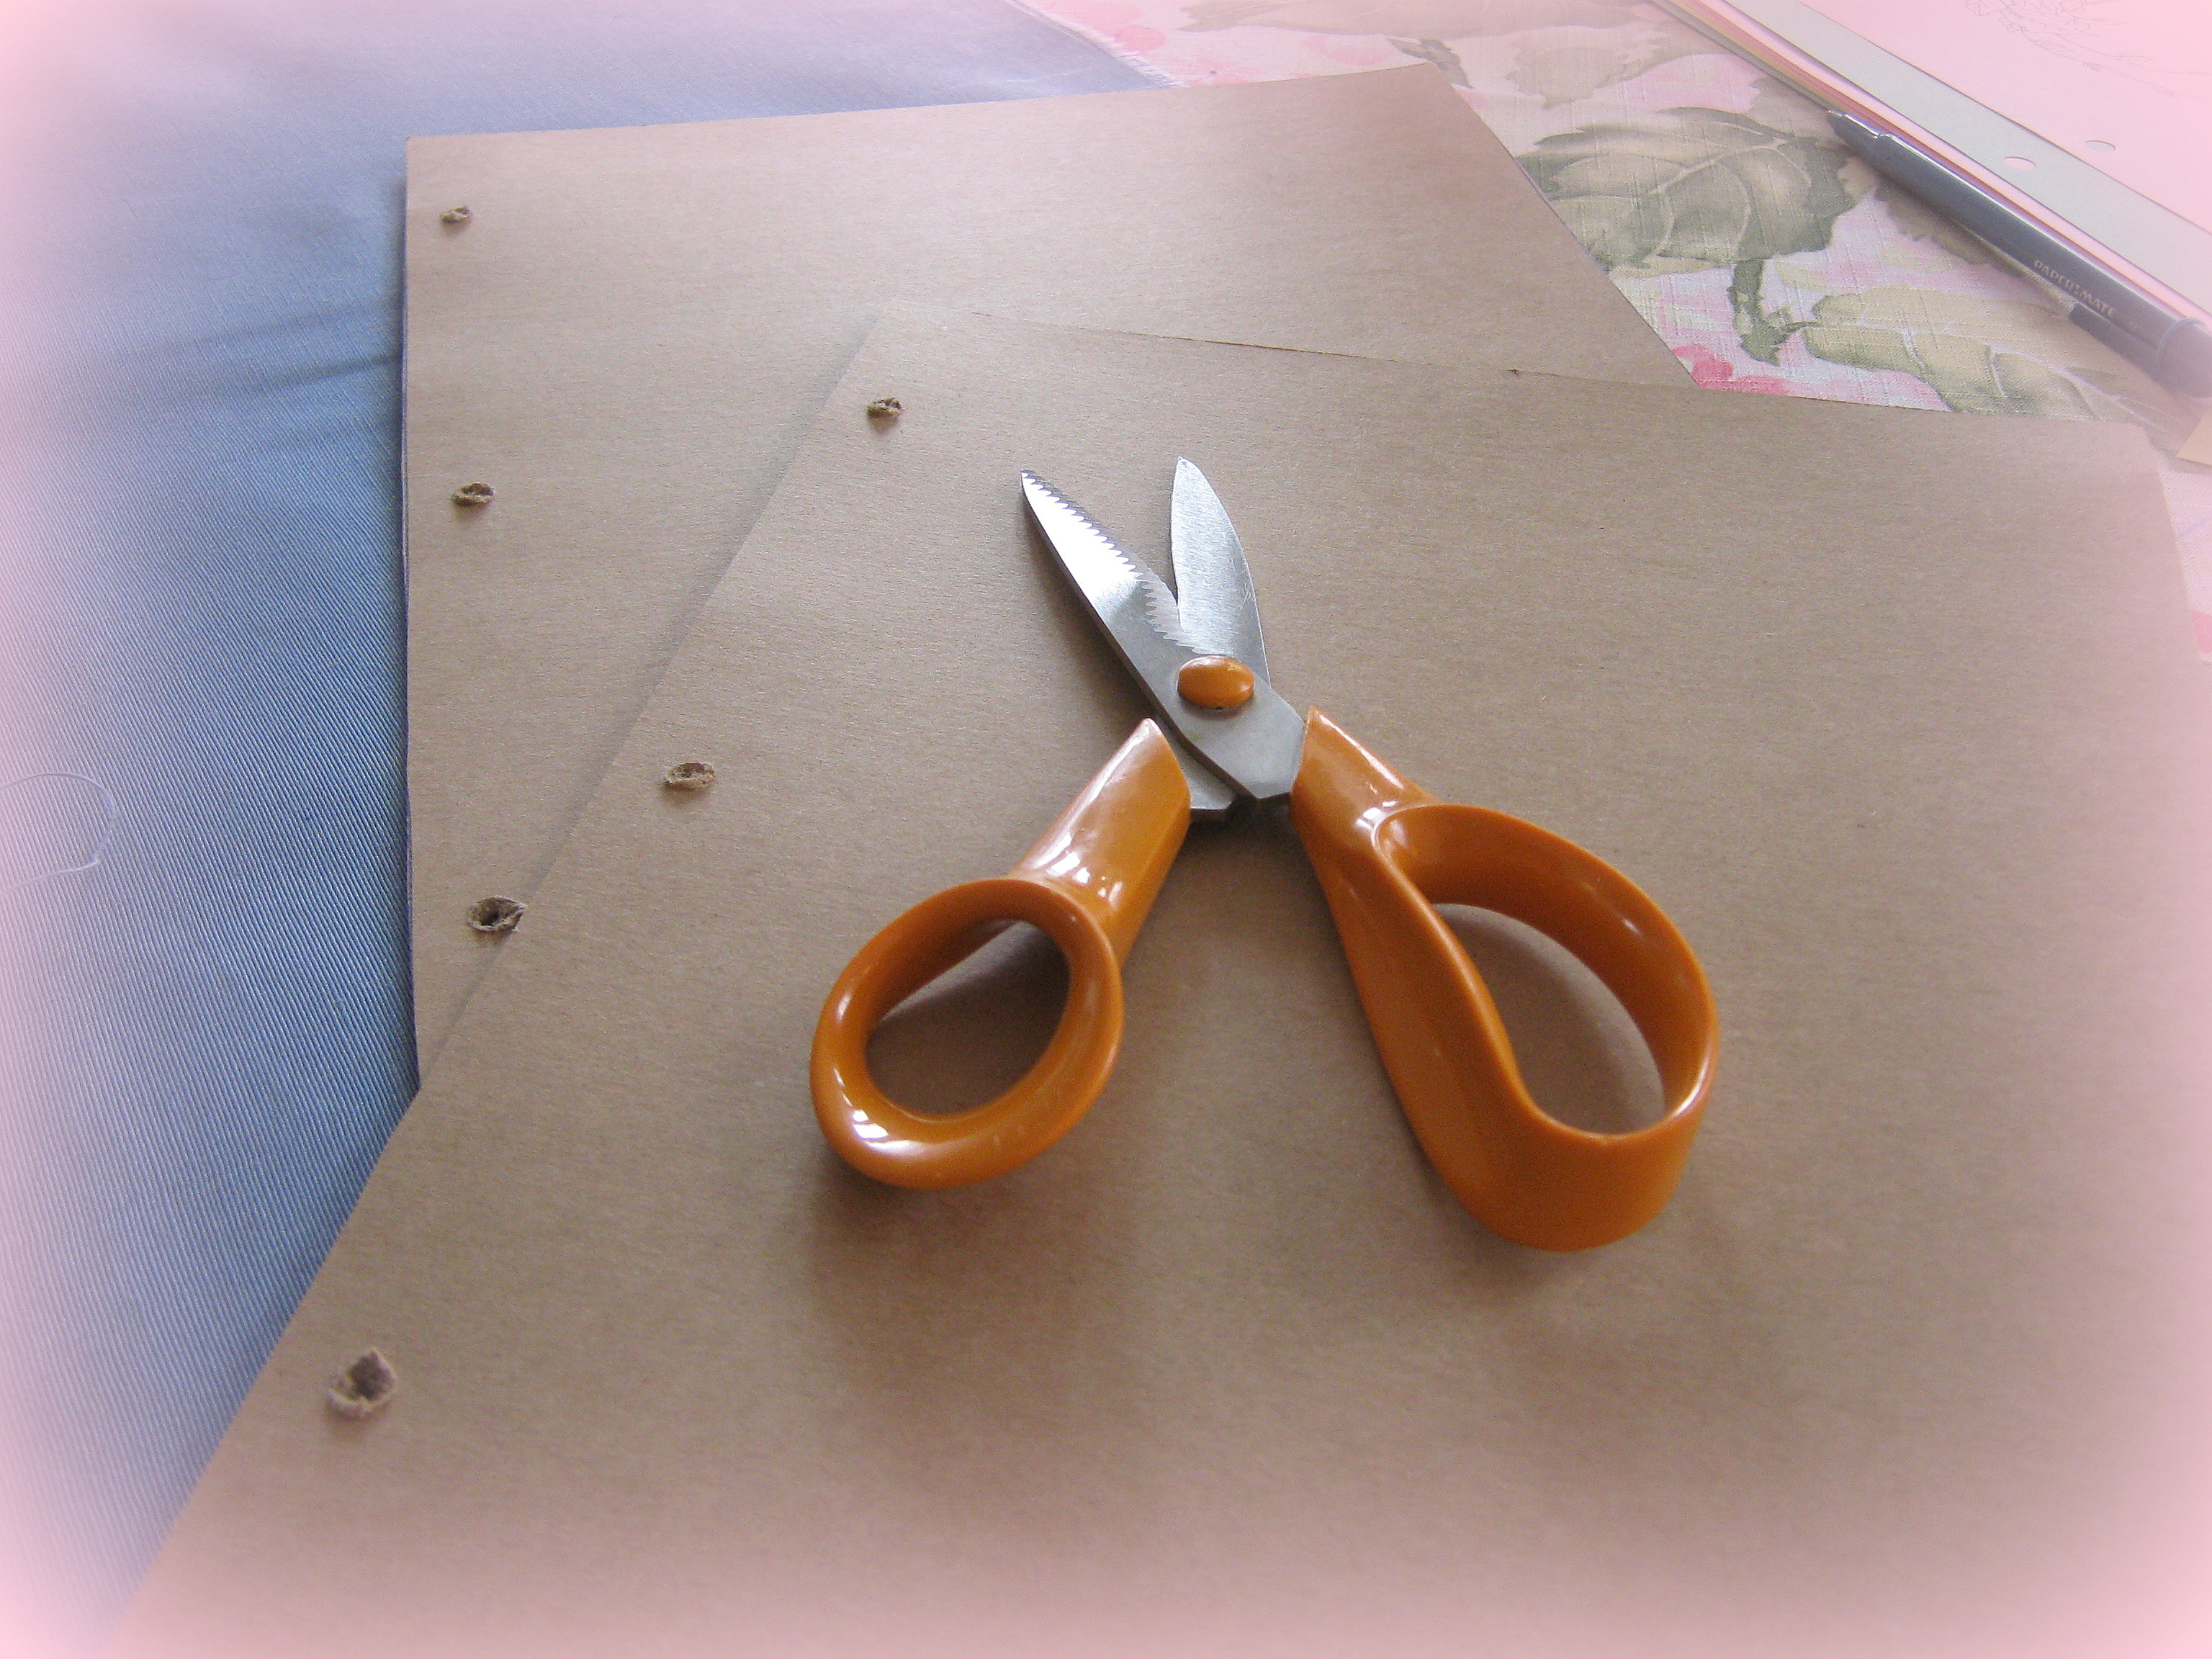
I began this journal construction….using of all things…cereal box cardboard–for covers…
–just be sure to cut your covers about 1/4 of an inch larger than your pages–on all sides, except the left, to create the cover’s overhang which will protect the page edges!
You can see this illustrated in the pic below..as well as catching a glimpse of the finished, printed pages, ready to go inside the covers–they’re printed on pastel-coloured papers–and turned out so pretty!

Much thanks to my husband, who copied and printed off all the pages for me–he is a such a sweetie!
Thirteen copies of each of the 4 thankfulness sketch designs makes enough pages for one full year of journaling–at one page–front and back–per week—-or for two years, if using just one side per week….but don’t let the number of pages limit your thankful and expressive writing!
You…
….can
always….
…add
more…
…..pages!
I punched all the pages, and then, using one as a template, marked where the holes on the cardboard cover needed to go–to line up with the pages. I used the sharp tip of my scissors to create holes in the cardboard–since it was a little too thick for the hole-puncher.
Next, you can simply glue on some pretty paper or fabric to cover the outside of the cardboard.
If you like, you can do each piece of cardboard separately, but if you do, the left edges of your paper will show as well—or you can use just one piece of material for both covers, laying them side by side on the material, separated by about 1/2 of an inch of material.
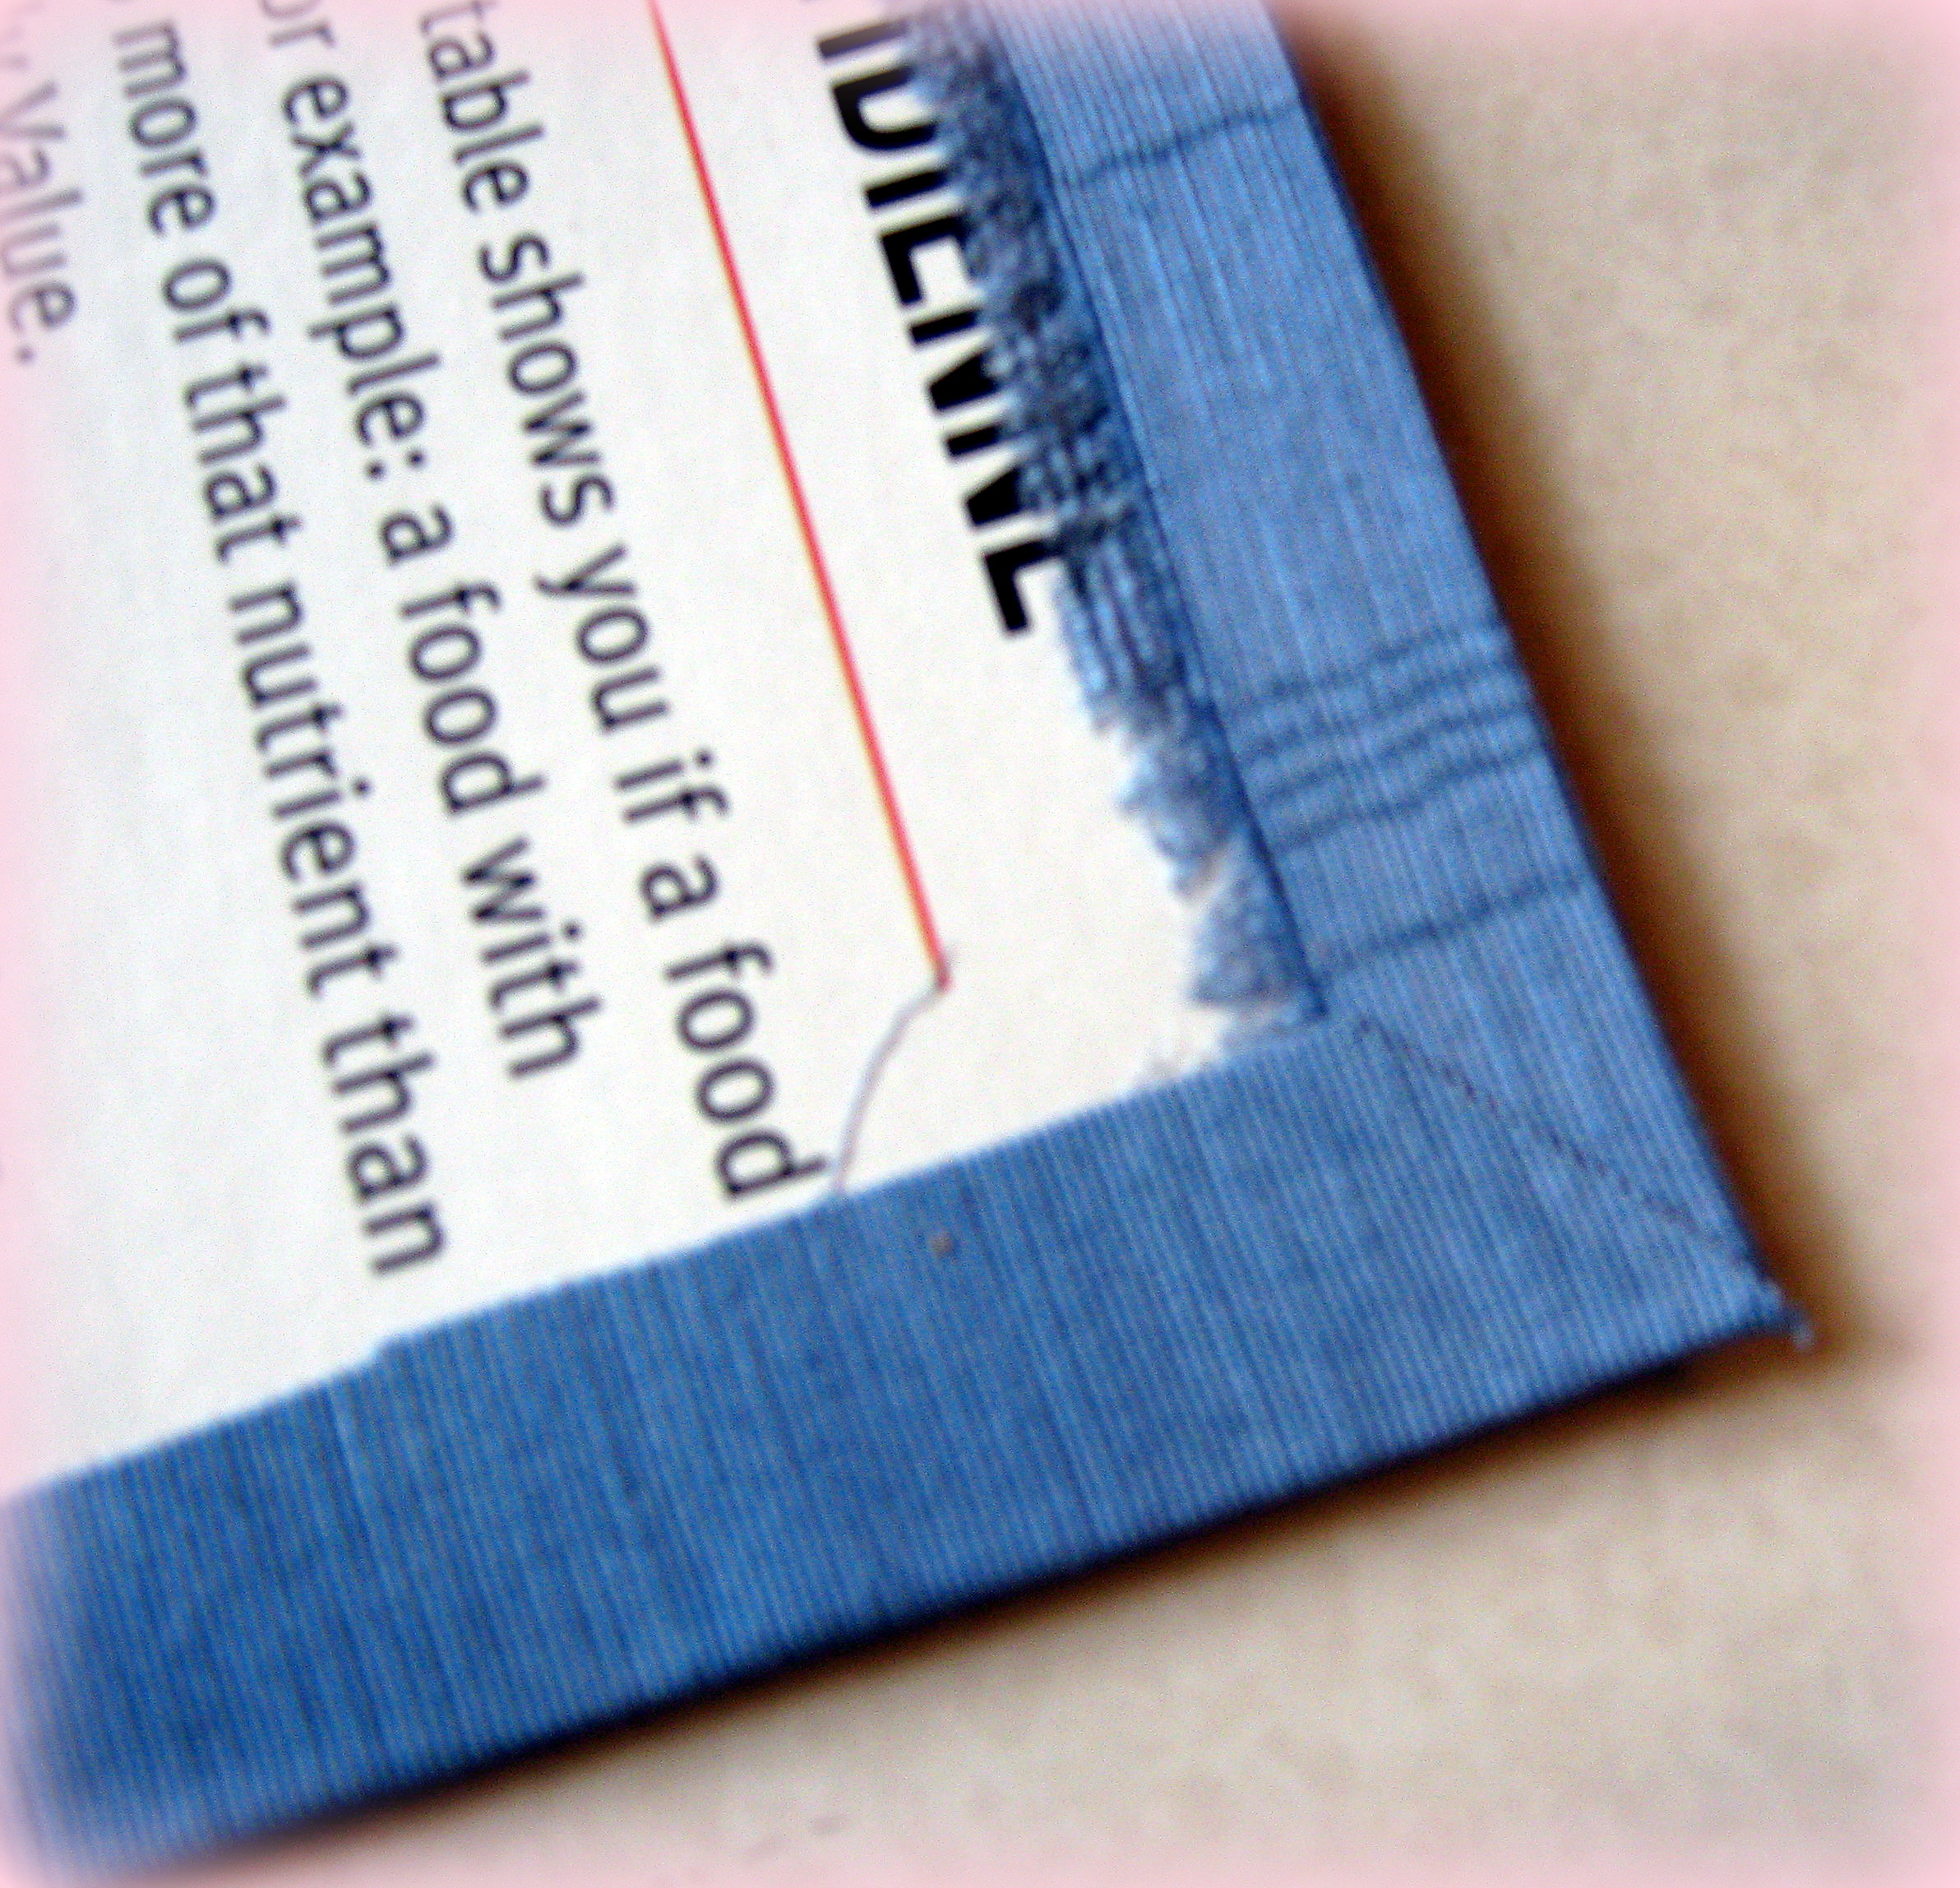
Make sure to cut your material about 3/4 of an inch larger than the cardboard covers on all sides, to fold in over the cardboard.
I chose to use just 1 piece of fabric, as mentioned above–calculating for the size of the 2 cardboard covers–plus 3/4 of an inch of extra fabric on all sides to fold in, and then allowing about 1/2 of an inch of extra fabric between my 2 cardboard covers (which will be the spine of the book, when closed.) I used spray adhesive–on the fabric–doing the spraying outside, and immediately bringing my fabric back inside to work on the kitchen counter before it could dry. It’s a good idea to have your work space completely ready, with all your components and tools at hand, before spraying on the adhesive–because once you spray it, you want to work quickly! BTW: rubbing alcohol works well to clean this glue off your hands or work-surface.

Immediately after applying your glue to the cover material, lay out your cardboard covers. Remember to leave the 1/2 inch space between them if you are laying them side by side on one piece of material! Clip the corners of your cover material, at a 45 degree angle, close to the cardboard’s corners, and quickly fold over your material to the inside of your cardboard cover, in order to hide the cardboard’ edge.

Like this….
If the corners are a tad messy, (sorry that this pic is fuzzy–but trust me–my corner was a tad messy!) use a wee bit of white glue on your fingertip to dab the corners, manipulating the paper, or fabric threads, to push them into place, and tidy them up. Once the white glue has dried, you can come back and use your scissors to trim off anything you may need to–to create neat corners.
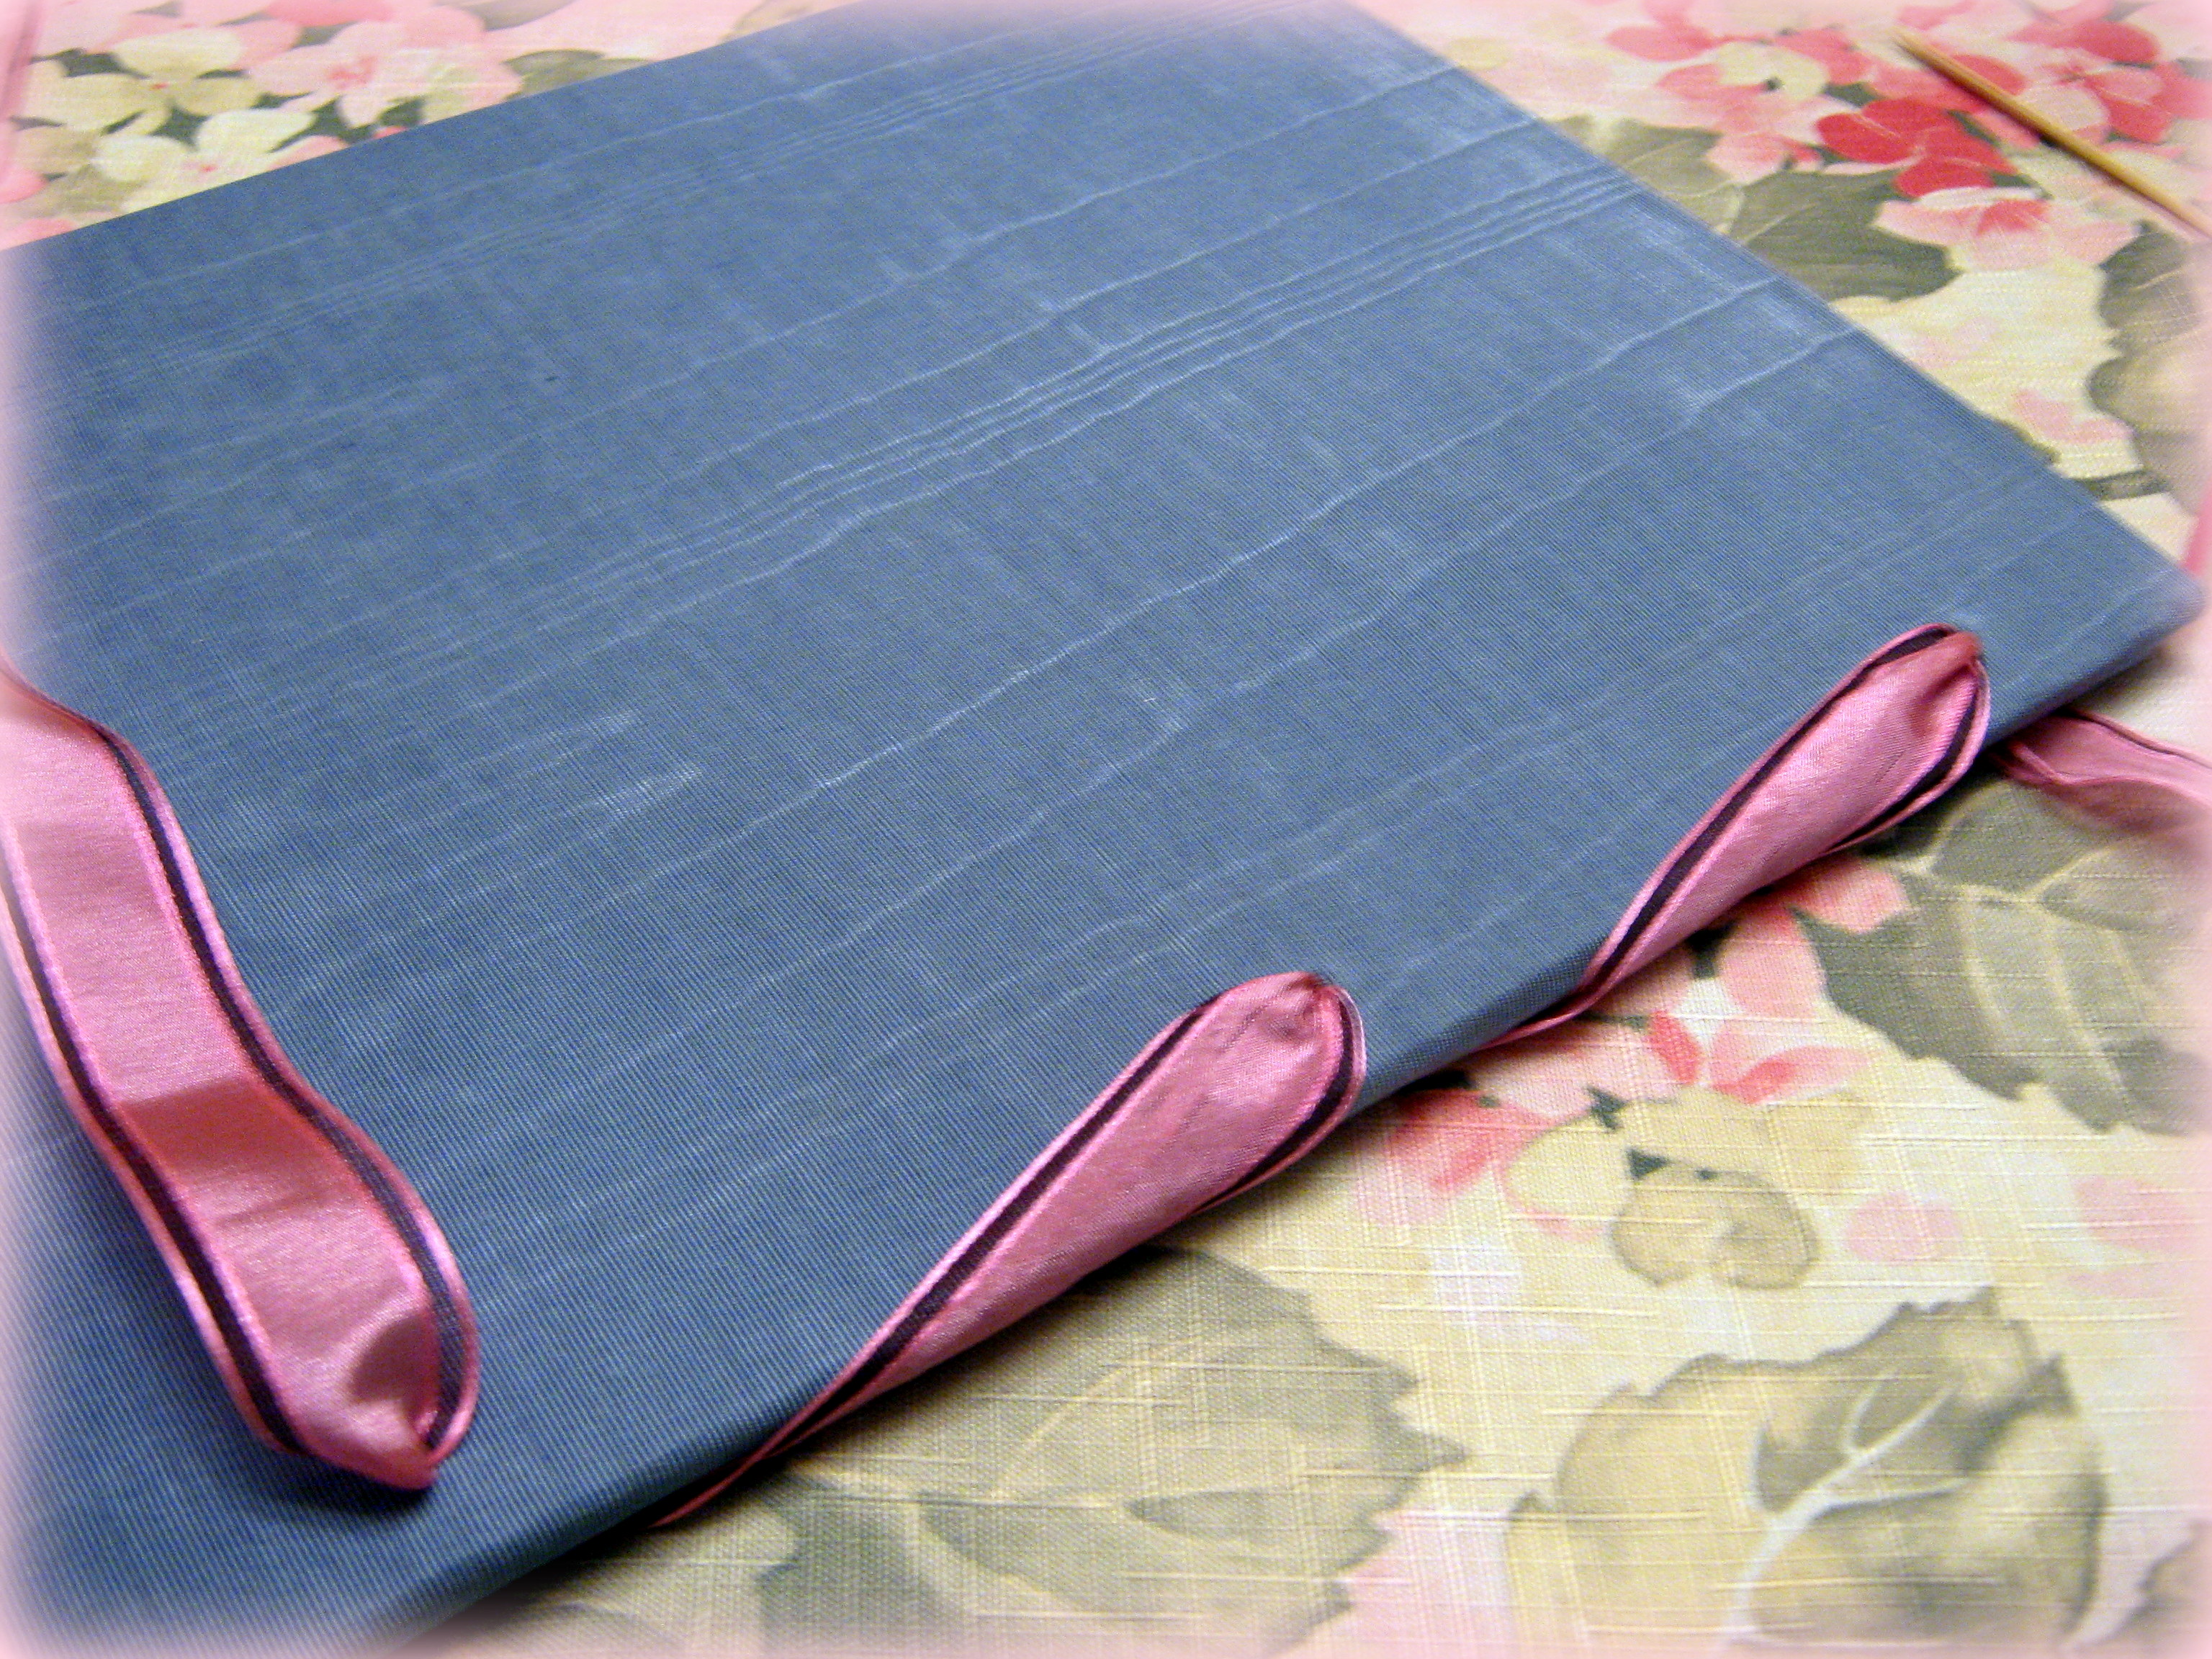
As you saw…a couple pictures back up the post…I included a pink ribbon for a bookmark for the journal, by pressing it into the spine area while the glue was still damp, and then reinforced it with another strip of fabric, gluing it over the ribbon.
Next, using glue and card stock or heavy paper, line the insides of the cardboard covers, to hide the cardboard, and the raw edges of the material you used on the outside of the cover after folding it inside. You’ll need to punch holes in the paper first, before gluing it in place. See how tidy the inside of the cover appears after covering it?

You’ll need to create holes on the outside of your cover–for fastening it all together–through your fabric or paper. The very tip of a craft knife works well for this–just make a tiny X–that’s all you’ll need…then tie up your copied and printed journal pages with ribbons, strings, or brad fasteners…
I used a bamboo skewer’s blunt end to push ribbon through the punched and pierced holes…starting at the base of the journal…and bound it in a criss-crossed fashion, first lacing it one way….
…..and then lacing it in the other direction…finishing it off by tying a bow at the top.

I coloured the cover graphic, below–printed onto sturdy card stock–with Crayola Watercolor Pencil Crayons, which I love!…then used a slight amount of water to blend the colours…then let it dry and trimmed the paper to size. I was asked if this cover could be copied and printed, since it’s already coloured–and yes–by all means, you may use this coloured image if you’d like…but unfortunately, I’d already glued it to the journal cover with the buttons, so…those little buttons may be in you way….though if you rounded the corners of your copy, you could cut them out…..but the graphic quality is not as crisp as I would like it to be…I’m sorry….I had to photograph it, instead of scanning it, since the buttons would mess up the scan results, causing shadows…*sigh*
But here’s the journal’s cover graphic in colour:

Using spray glue again, I glued the above graphic onto the cover…
…and I have to confess …that I ran outside onto the deck….dusted in snow and ice….to do the adhesive spraying onto the back of the graphic…….barefooted! I knew it would only take a few seconds…and I figured I didn’t really need shoes for just a few seconds, right? I was wrong! It was too c..c…c…coooooold!
Lastly–I embellished the cover graphic and ribbon bow by gluing on these genuine antique shell buttons for an extra special finish!
And ta-da…the journal was finished!!
Below is the black and white version of the cover graphic, if you’d like to have it…and if you don’t want to colour it–it would look nice just printed onto coloured paper instead.
Remember–you may print as many copies of these graphics as you want–just like all the graphics on this blog–as long as they are for personal use…and not re-sale!
I hope you’ll have fun journaling your thanksgivings to God!!
If you make a journal…I’d sure love to have you send in pics from your project to share with us!
But most importantly, remember to thank the Lord each day for His myriad blessings!!!
Hugs!
Lisa

Beautiful journal idea Lisa! It’s amazing to see how much we can come up with when we set our minds to be thankful to God for His wonderful blessings! Truly indescribable! ♥
Wonderful!! His blessings are truly indescribable–and you, Cathy–are just the kind of daughter to express your heart-felt gratitude to Him!! I’m sure that makes Him happy!! Hugs!
________________________________
This is sooo nice of you, Lisa! Thank you for going to all this trouble (brrrrr…cold feet) to share this!
Thanks Cheryl!! I love to be able to share these! � And…lol!!� Yes brr!! Hugs!
________________________________